


Introduction
Surviving The Last of Us™ Part I on higher difficulties—like Survivor or customized tougher settings—demands more than firefights. It’s a meticulous balance of gathering scarce resources, crafting smartly, and choosing when to fight, sneak, or flee. This guide dives deep into that challenge, showing you how to master resource and combat management from prologue to final act. Each section progresses logically with timing and meaning, offering layered strategies for high-stakes play.
1. Prologue Setup: Early Scavenging Discipline
In the opening chapters, resources are sparse, but your baseline survival depends on how you scavenge from the get-go. Focus on exploring every corner—even seemingly mundane drawers or corners can hold crafting materials, pills, or ammo that set the pace for the entire chapter. Build an early habit: check every room and nook; the game rarely gives you a second chance to gather once you’ve advanced. Skipping this can leave you desperately under-equipped later.
At the same time, resist the urge to exhaustively upgrade. At this stage, the priority is to collect tools and scraps—wait to apply upgrades until you reach safer areas with more crafting options. Use early workbenches (when they appear) to upgrade holsters first, gaining flexibility in weapon swaps. This early discipline gives you the ability to switch between ranged and melee weapons quickly—critical when surprises pile up.
2. Establishing Patterns: Stealth vs. Engagement
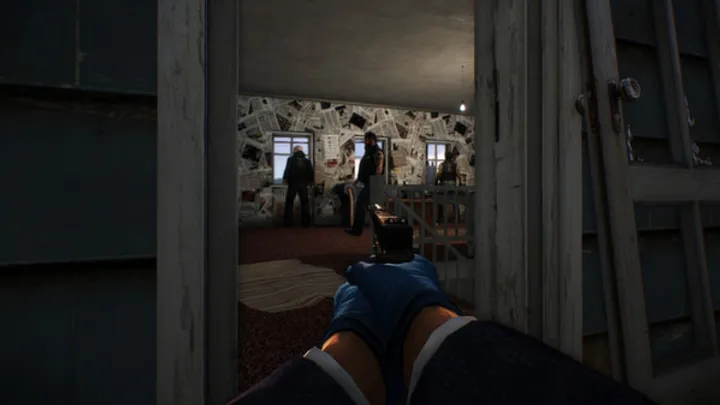
Once enemy encounters begin, decide early if stealth or direct confrontation will define your style. On higher difficulties, stealth usually conserves resources. Always approach enemy zones cautiously: tap listening mode to spot foes and identify paths that avoid heads-on conflict. If you choose stealth, focus on executing isolated takedowns—one enemy at a time reduces noise and resource drain.
Combat, when unavoidable, should be streamlined. Prepare distraction tactics—throw bricks or bottles to divert attention, then flank or stealth-kill. These small plays save ammunition and health resources. If detected, retreat smartly: don't fight in open spaces. Move through alternate paths or doors, find cover, and reset stealth before reengaging.

3. Shiv Strategy: Essential but Economized
Shivs are both precious and essential—for dealing with Clickers and unlocking unique rooms. Early on, aim to unlock the Shiv Master skill that reduces shiv usage when grabbed—a lifesaver on difficult modes. Always keep at least one shiv ready in your inventory, and reserve others for opening shiv-locked doors. These rooms often contain valuables like training manuals or tools that pay back in upgrades.
But be careful not to overcraft shivs at the expense of med kits or bombs. The balance is delicate: inventory space is finite, and crafting materials are limited. Prioritize crafting shivs when encountering a locked door or a high-risk zone filled with Clickers. Otherwise hold off—wasting blades on melee upgrades is often less valuable than preserving shivs for emergencies.
4. Crafting Margins: Holsters First, Utility Second
When you reach your first workbench, upgrade holsters immediately—for both long guns and sidearms. This allows you to equip up to four weapons and switch fast mid-combat. Speed and flexibility here are game-changers, enabling you to adapt on the fly without digging through your backpack.
After holsters, craft utility items: med kits, smoke bombs, nail bombs, and Molotovs—but only when you have a secure crafting moment (e.g., quiet area or covered spot). Open your inventory in unsafe zones risks ambush since the game doesn't pause. Never craft under fire. Always find a secure pause point first.
5. Combat Flow: Preparation, Engagement, Exit
Every combat should follow three phases: prepare, engage, exit. Before triggering fights, reassess: can you draw enemies into tighter, controllable spaces? Can you topple them before they converge? Use listening mode, look for vantage or choke points, and pre-craft stealth weapons or bombs.
During fights, stick to plan—don’t linger in open. Be resource mindful: use your best ammo only when necessary, and switch weapons depending on encounter size and enemy type. Leave flaws in enemy paths: an early flank can end a fight before loss.
Once engagement ends—or if overwhelmed—exit early. Backtracking or hiding gives you space to heal or craft, and forces enemies to respawn or forget your position.

6. Mid-Game Reinforcement: Upgrading Skills Thoughtfully
As you collect supplements (pills), upgrade maximum health first, then listening mode range. These are high-impact survival skills. Other upgrades like crafting speed or healing speed help but are secondary. Save pills until you can buy meaningful value from them—this economy lets you stay agile in prolonged segments.
Also look for weapon upgrade manuals. Wielding a scoped or increased-capacity hunting rifle gives huge returns. Don't upgrade casually: prioritize capacity over fire rate early on—having more bullets per clip outranks damage if you risk running dry mid-fight.
7. Advanced Enemy Awareness: Know Your Threats
Every infected class demands different responses:
- Runners: Use stealth or silent melee takedowns.
- Stalkers: Watch corners with listening mode; avoid stealth surprises.
- Clickers: Use shivs or distractions. Never run at one head-first.
- Bloaters: Keep distance; use heavy hits from Molotovs, bombs, or rifle—never melee.
Recognize threat types early and adjust tactics immediately; this prevents costly mistakes like running into a room swarmed by clickers unprepared.
8. Resource Recycling: Bow Arrows and Scavenging Loops
Late game supplies tighten—every bullet counts. Use the bow frequently—it’s quiet, efficient, and arrows can often be recovered from bodies. After kills, always check for retained arrows.
Explore rooms thoroughly at each stage—boxes, drawers, even corpses often hide ammo or crafting scraps. If you’re ahead and confident, circle back briefly to last-known safe rooms to clear overlooked items.
9. Save Smart: Manual vs Autosave Awareness
The Last of Us includes autosaves, but on higher difficulty, manual saves are essential. Save before entering combat zones or after major acquisitions. If the autosave triggers bug (rare, but historically present), you'll still have rollback options.
After tough encounters or before pushing deeper, create a manual save slot. This conserves progress and materials in case of surprise failures, minimizing frustration.
10. Endgame Flow: Conserving for Final Climaxes
As you near the endgame, inventory should reflect readiness: med kits, fire bombs, ammo, and at least one shiv. Avoid overspending crafting parts. Save high-impact items for final sequences, which often present ambushes or push-heavy enemy volumes.
Don't recycle resources earlier obtained; what you don't use in Chapter 10 may be what keeps you alive in the final climatic moments. Endgame management counts as much as early planning.
Conclusion
Mastering resource and combat management in high-difficulty play of The Last of Us™ Part I is a delicate, layered strategy. From disciplined early scavenging and shiv economy to smart holster upgrades, enemy-type awareness, manual saving, and final-end preparation—each step builds toward survival mastery. Stick to stealth when possible, craft intentionally, recycle ammo, and always plan your next three moves. With this guide, you have a nuanced roadmap for tough, rewarding play—and a chance to truly survive smarter, not just harder.