7 Days to Die is a unique blend of survival horror, crafting, and tower defense. Set in a post-apocalyptic world overrun by zombies, players must gather resources, build shelter, and prepare for increasingly dangerous hordes that arrive every seventh night. This guide walks you through the game chronologically—from your first moments to late-game mastery—offering practical tips and strategies to help you not just survive, but thrive.
Day 1: Starting Smart
Your first day is all about survival basics. You spawn with minimal gear and a short tutorial quest that teaches you how to craft and gather.
Start by collecting plant fibers, wood, and small stones to craft a stone axe. This tool is essential for gathering resources and basic defense. Complete the tutorial to earn skill points and locate a trader.
Avoid combat unless absolutely necessary. Zombies are slow during the day but still deadly, especially when you're under-equipped.
Checklist for Day 1
- Craft stone axe, bedroll, and basic clothing
- Loot nearby buildings cautiously
- Find shelter before nightfall
Pro Tip Use stealth to avoid zombies and conserve stamina. Crouching reduces noise and visibility.
Days 2–3: Establishing a Foothold
Once you've survived the first night, it's time to find a more permanent base. Look for a location near a trader and water source, ideally on high ground.
You can either reinforce an existing structure or build a simple wooden shack. Reinforce doors and windows, and start crafting storage chests and a campfire.
Loot nearby Points of Interest (POIs) for food, tools, and schematics. Avoid high-risk biomes like wastelands and burnt forests.
Base Essentials
- Secure all entry points
- Place a land claim block to prevent zombie respawns
- Set up food and water sources
Pro Tip Upgrade wooden blocks to cobblestone early for better durability.
Days 4–6: Skill Building and Exploration
Now that you have a base, focus on leveling up and unlocking perks. Choose a build path—Strength for melee and mining, Intellect for crafting and traps, or Perception for looting and sniping.
Explore nearby towns and industrial areas for better loot. Use stealth and ranged weapons to avoid direct combat.
Start crafting iron tools if you've unlocked the necessary perks.
Recommended Perks
- Miner 69er (Strength)
- Advanced Engineering (Intellect)
- Lucky Looter (Perception)
Pro Tip Use sneak attacks with bows or crossbows to silently eliminate zombies and gain bonus damage.
Day 7: Preparing for the First Horde
The seventh night brings your first blood moon horde. Zombies will detect your location and attack relentlessly from 22:00 to 04:00.
Build a horde base separate from your main shelter. Use elevated platforms, traps, and choke points to control zombie movement.
Craft spikes, barbed wire, and electric fences if available. Stock up on ammo, repair kits, and medical supplies.
Horde Base Design
- Elevated walkway with narrow path
- Trap corridor with spikes and turrets
- Escape route in case of breach
Pro Tip Use junk turrets and molotovs for crowd control. Keep repair tools on hand during the fight.
Days 8–14: Expanding and Automating
After surviving your first horde, it's time to expand. Upgrade your base with concrete and steel. Automate defenses using electric traps, motion sensors, and blade traps.
Begin farming and crafting advanced gear. Explore Tier 2 and Tier 3 POIs for better loot. Complete trader quests to earn dukes and reputation.
Automation Goals
- Electric fences and blade traps
- Generator bank with solar backup
- Automated doors and lights
Pro Tip Use relays and switches to control power flow. Group traps by function for easier maintenance.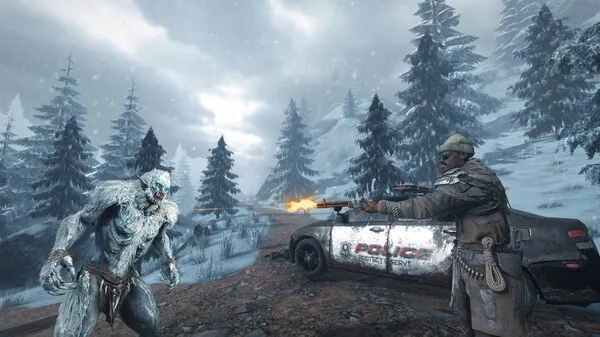
Days 15–21: Advanced Crafting and Vehicles
With your base secure, shift focus to crafting vehicles and advanced gear. Unlock the Grease Monkey perk to build minibikes, motorcycles, and 4x4 trucks.
Craft steel tools and weapons. Use mods to enhance durability, damage, and utility. Set up a forge, cement mixer, and chemistry station for efficient production.
Crafting Milestones
- Minibike or motorcycle for faster travel
- Steel pickaxe and fireaxe
- Tier 5 weapons with mods
Pro Tip Use the trader’s vending machines to buy rare schematics and parts.
Days 22–28: Horde Optimization and Loot Runs
Prepare for the next blood moon by upgrading your horde base. Add electric traps, dart traps, and blade traps. Use motion sensors to trigger defenses automatically.
Go on extended loot runs to high-tier POIs like factories, hospitals, and military bases. Bring lockpicks, food, and repair kits.
Loot Run Essentials
- Lockpicks and eye candy loot buff
- Full inventory space
- Backup weapons and meds
Pro Tip Use the Lucky Looter goggles and loot candy for maximum rewards.
Days 29–35: Farming and Sustainability
By now, you should be self-sufficient. Set up large-scale farms for food and medicine. Use the Living Off the Land perk to maximize crop yields.
Craft seeds from harvested crops and rotate planting cycles. Build greenhouses or underground farms to protect against weather and zombies.
Farming Staples
- Corn, potatoes, blueberries
- Aloe vera and chrysanthemum for medicine
- Mushroom and hops for brewing
Pro Tip Use irrigation and lighting to boost growth. Keep crops inside your land claim zone to prevent destruction.
Days 36–49: Endgame Gear and Base Fortification
Start crafting endgame gear like military armor, M60 machine guns, and rocket launchers. Upgrade your base with steel walls and automated turrets.
Install motion sensors, shotgun turrets, and SMG turrets. Use vault doors and hatches for maximum security.
Endgame Upgrades
- Steel-reinforced walls and vault doors
- Automated turret network
- Full gear sets with mods
Pro Tip Use the drone companion for healing and storage. Keep backup gear in a secure bunker.
Day 50+: Mastery and Creative Expansion
Once you've mastered survival, shift to creative goals. Build mega-bases, underground bunkers, or sky towers. Use creative mode to experiment with designs.
Challenge yourself with permadeath runs, PvP servers, or modded gameplay. Share your builds and strategies with the community.
Creative Goals
- Build themed bases (castle, prison, lab)
- Try mod packs like Darkness Falls or Undead Legacy
- Host multiplayer events or challenges
Pro Tip Use prefab editor tools to design custom POIs and share them online.
Conclusion
7 Days to Die is more than just surviving zombies—it's about mastering systems, building empires, and evolving your playstyle. From the first stone axe to automated turrets and mega-bases, every day brings new challenges and opportunities. Whether you're a lone wolf or part of a team, this guide helps you navigate the apocalypse with confidence and creativity


